Installing .ocx files is a simple process that can be done in a few minutes. You can install .ocx files directly to Windows, or to the software installation folder where the application .exe is located.
System Installation
Installing .ocx files to the Windows system folder is the most common method. Simply place the .ocx file in the appropriate Windows system directory. If the .ocx file already exists, make a backup before installing.
Place 64-bit OCX's in the '/Windows/System32' directory.
Place 32-bit OCX's in the '/Windows/SysWOW64' directory.
Software Installation
Installing .ocx files where the software's .exe file is located offers several advantages. Using this method, the .ocx file is isolated to the software, rather than a shared resource in the Windows System.
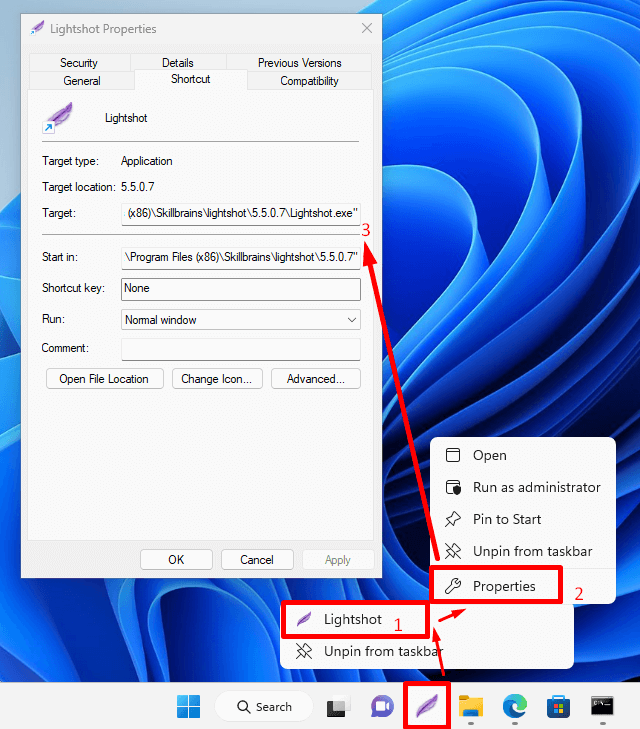
To locate the .exe file, right click the application shortcut.
Right click and select properties.
Copy the target location. (without .exe)
Navigate to the target location you copied and place the .ocx files into this folder.
Discover Application Install DirectoryInstall OCX File into Application Directory